들어가기에 앞서 본 포스팅은 백기선님의 인프런 강의를 기반으로 작성된 포스팅임을 알려드립니다.
처음 스프링을 배우는 입장이라 정확하지 않은 정보가 있을 수 있습니다.
댓글을 통해 알려주신다면 최대한 빨리 피드백하도록 하겠습니다!
Bean의 등록
Spring Boot에서 Bean은 ComponentScan을 통하여 등록됩니다.

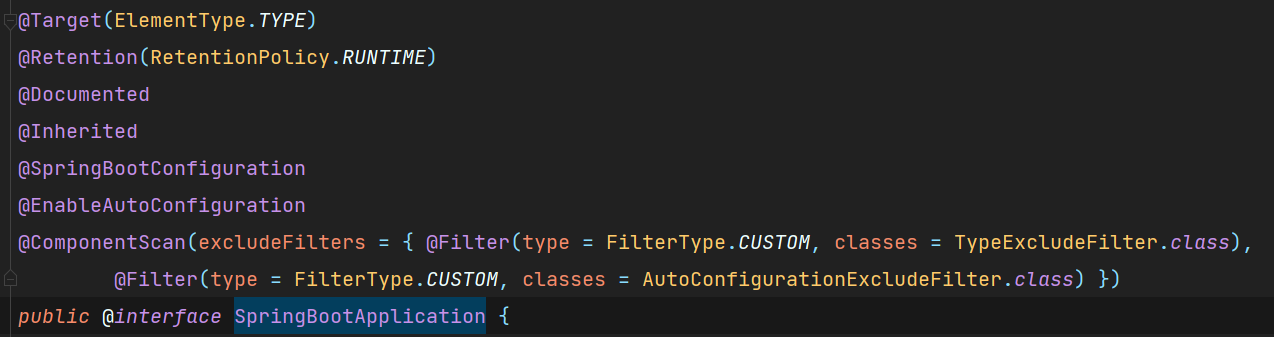
@SpringBootApplication 이라는 애노테이션 내부를 확인해보면 @ComponentScan 이라는 애노테이션이 메타애노테이션으로 달려있는 것을 확인할 수 있습니다.
Spring Boot 프로젝트는 이 @SpringBootApplication이 붙어있는 클래스 이하의 경로에 있는 클래스들을 대상으로 @Component 가 붙어이는 애노테이션을 탐색하여 Bean으로 만들어주는 작업을 합니다.
@ComponentScan와 @Component
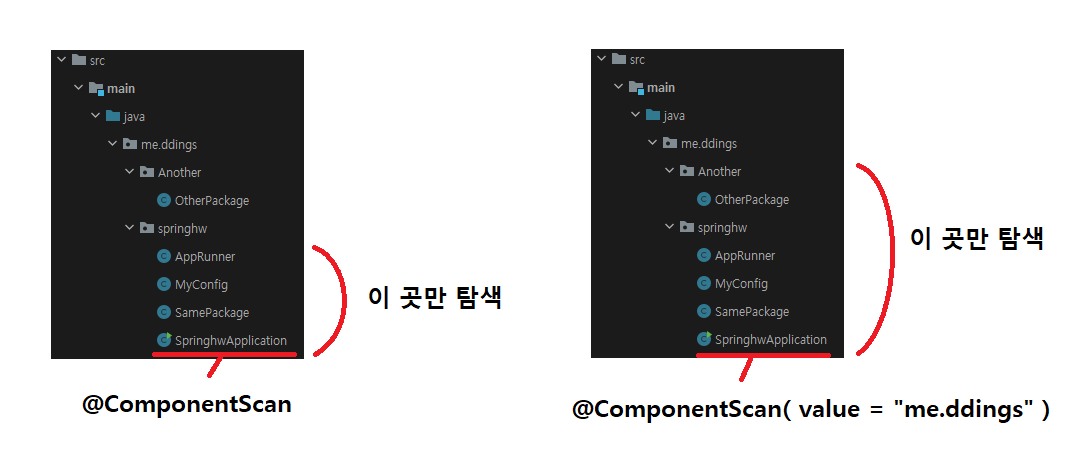
@ComponentScan은 Bean으로 만들어 줄 클래스를 탐색하는 위치, 그리고 어떤 애노테이션을 스캔할 지 판단하는 역할을 담당하고 있습니다.
탐색위치를 지정하지 않으면 해당 애노테이션이 위치한 경로를 포함한 하위경로들을 탐색합니다.
이미지에서 확인한 것 처럼 @ComponentScan에 대한 docs를 살펴보면 bean을 만들기위해 탐색하기 시작하는 위치를 지정할 수 있습니다.
Either basePackageClasses() or basePackages() ( or its alias value() ) may be specified to define specific packages to scan.
ComponentScan (Spring Framework 5.3.5 API)
The BeanNameGenerator class to be used for naming detected components within the Spring container. The default value of the BeanNameGenerator interface itself indicates that the scanner used to process this @ComponentScan annotation should use its inherite
docs.spring.io
@Component
public class SamePackage {
}
@Component
public class OtherPackage {
}
@Configuration
@ComponentScan(value = "me.ddings" )
public class MyConfig {

}
public class SpringhwApplication {


    public static void main(String[] args) {

        ApplicationContext context = new AnnotationConfigApplicationContext(MyConfig.class);
        String[] beanDefinitionNames = context.getBeanDefinitionNames();

        Arrays.stream(beanDefinitionNames).forEach(System.out::println);
    }

}
실제로 다른 패키지에 존재하는 클래스의 경우 @ComponentScan에 아무런 옵션을 주지않으면 bean으로 생성되지 않습니다.

그에 비하여 탐색에 필요한 위치를 지정하게되면 해당 위치를 포함한 하위 디렉토리의 클래스들을 탐색하여 Bean을 생성하는 것을 확인할 수 있습니다.
@SpringBootApplication 에 붙어있는 @ComponentScan을 살펴봅시다.

따로 탐색 위치를 지정해주지 않는 것을 통하여 @SpringBootApplication 이 붙어있는 클래스의 위치를 포함한 하위 경로들을 탐색한다는 것을 확인할 수 있습니다.
@ComponentScan이 탐색하는 애노테이션은 모두 @Component가 메타 애노테이션으로 붙어있는 애노테이션들입니다.
- @Controller
- @Service
- @Repository
- @Configuration
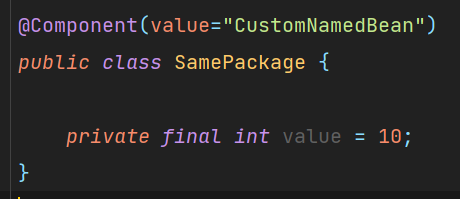
기본적으로 @Component가 붙은 클래스는 해당 클래스의 첫 글자가 소문자인 상태로 Bean으로 등록되며, 이를 사용자가 지정하는 것도 가능합니다.
value값을 지정해주면 해당 이름의 Bean이 생성됩니다.
@Component
public class AppRunner implements ApplicationRunner {

    @Autowired
    ApplicationContext context;

    @Override
    public void run(ApplicationArguments args) throws Exception {
        SamePackage bean = (SamePackage) context.getBean("CustomNamedBean");

        System.out.println(bean);
    }
}

ApplicationRunner를 통해 확인해보면 해당 이름으로 Bean이 등록되어 있는 것을 확인할 수 있습니다.
Spring Boot에서 Bean을 등록하는 방법
보통 @ComponentScan을 통하여 Bean을 등록하게 되는데, 이 외에 사용자가 원하는 bean을 등록하기 위해서는 @SpringBootApplication 이 붙은 클래스에 정의하면 됩니다.
@SpringBootApplication을 확인해보면 @SpringBootConfiguration이 붙어있는 것을 확인할 수 있는데, 내부에 @Configuration이 붙어있습니다.
즉, @SpringBootApplication이 붙은 파일이 시작점이자 자바설정파일이 됩니다.
@SpringBootApplication
public class SpringhwApplication {

    @Bean
    public CustomService customService(){
        return new CustomService();
    }

    public static void main(String[] args) {
        SpringApplication.run(SpringhwApplication.class,args);
    }

}
따라서 해당 위치에 원하는 Bean을 등록시킬 수 있습니다.
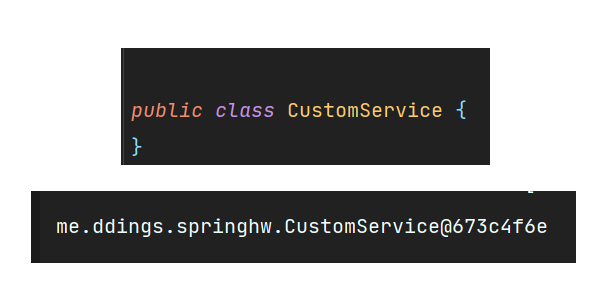
확인해보니 Bean이 등록된 것을 확인할 수 있었습니다.
이렇게 Bean을 등록하는 것 외에도 SpringApplicationBuilder 를 통하여 등록하는 것이 가능한데, 이게 좀 더 성능 상으로 좋다고 합니다.
@SpringBootApplication
public class SpringhwApplication {

    public static void main(String[] args) {
        new SpringApplicationBuilder()
                .sources(SpringhwApplication.class)
                .initializers( (ApplicationContextInitializer<GenericApplicationContext>) context -> {
                        context.registerBean(CustomService.class);
                })
                .run(args);
    }

}
Bean Scope
IoC컨테이너 등록된 Bean들은 Scope라는게 존재합니다.
이 Scope란 같은 클래스의 여러 Bean이 생성될 수 있는지를 판단하는 설정 값과 같습니다.
Default인 singleton은 처음 생성된 Bean을 계속해서 재사용 한다는 것을 의미하며, prototype은 동일한 클래스의 여러 Bean이 생성될 수 있다는 것을 의미합니다.
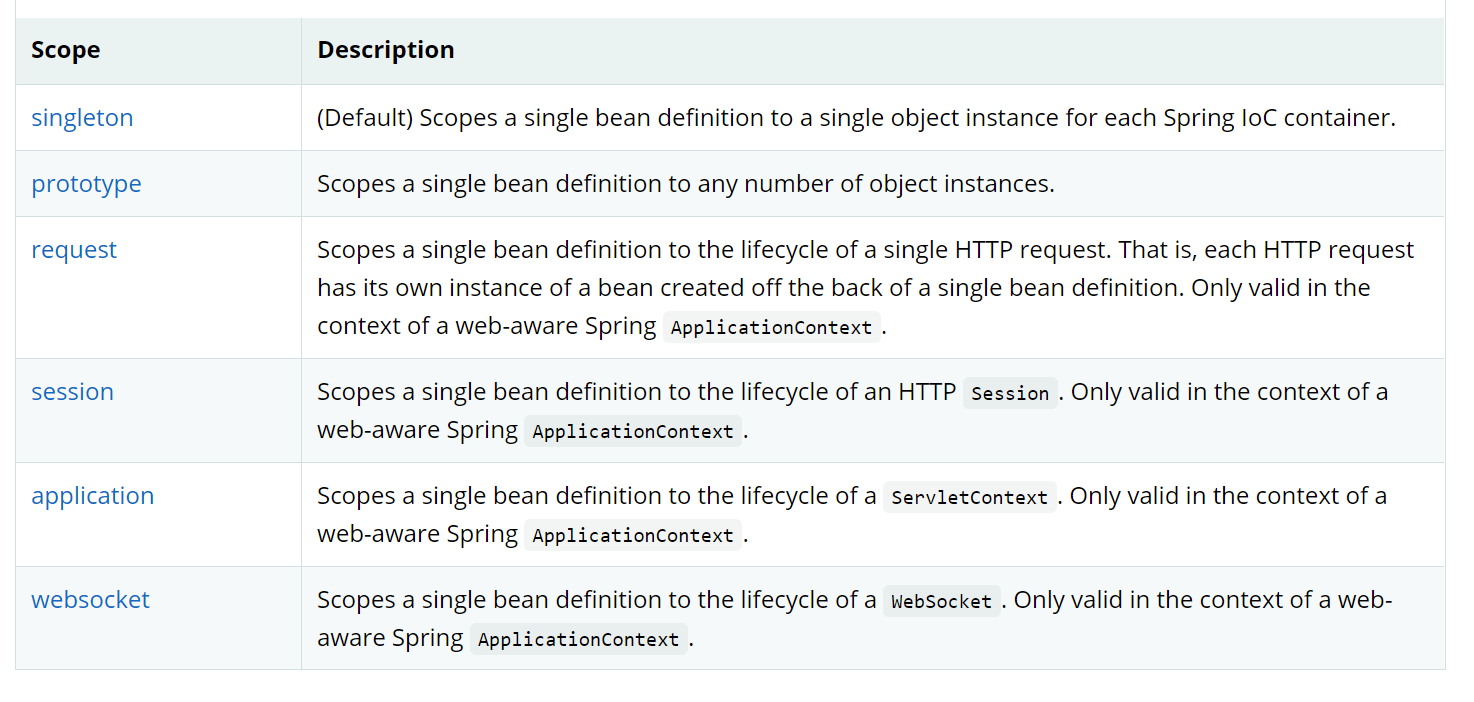
이 외에 request, session, application, websocket의 경우 웹 MVC를 공부할 때 알아보는걸로 하고, 이번엔 singleton과 prototype에 대해 알아봅시다.
Prototype과 Singleton
@Component
@Scope("prototype")
public class Prototype {


}
Bean의 Scope는 @Scope 애노테이션을 통하여 설정할 수 있습니다.

실제로 context를 통하여 확인해보면 Prototpye은 매 호출때마다 다른 객체가 반환되지만 Singleton은 항상 같은 객체가 반환됩니다.
여기서 Singleton 객체에서 Prototype 객체가 사용되는 경우는 생각해볼 수 있는데, 과연 어떻게 될까요?
@Component
public class Singleton {

    @Autowired
    private Prototype prototype;

    public Prototype getPrototype() {
        return prototype;
    }
}
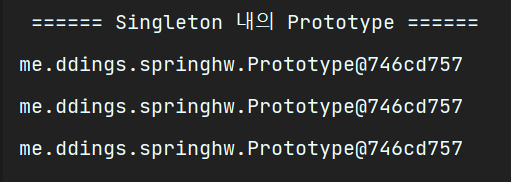
prototype이지만, 매번 같은 객체가 반환됩니다.
그 이유는 Singleton 객체의 생성 시 IoC컨테이너에서 Prototype의 객체를 꺼내오기 때문입니다.
Singleton이 한번 생성되고나면 다시 생성되는 일이 없기때문에 이때 꺼내온 Prototype의 객체를 계속 사용하는 거죠.
그렇다면 Singleton내의 Prototype객체를 prototype으로 사용하는 방법은 없을까요?
Singleton내의 Prototype객체를 prototype으로 사용하는 방법
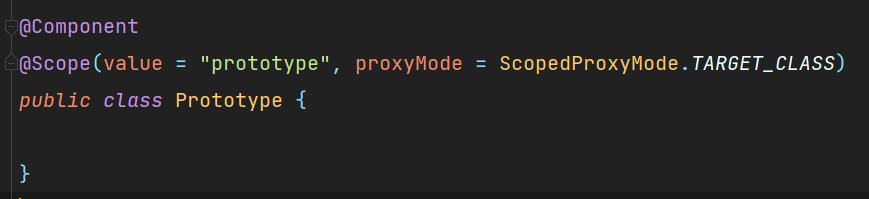
Prototype의 @Scope에서 proxyMode를 바꿔주는 것으로 Singleton내의 Prototype을 prototype으로 사용할 수 있습니다.
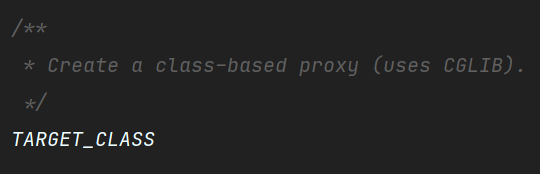
이는 CGLIB을 이용한 클래스 기반의 프록시를 생성하는 것으로 가능한 방법입니다.
여기서 CGLIB이란 Code generation library, 코드 생성 라이브러리를 의미하며, 프록시는 자바의 디자인패턴 중 하나를 의미합니다.
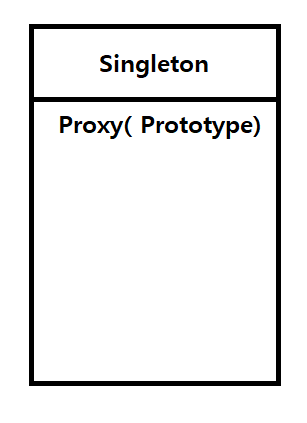
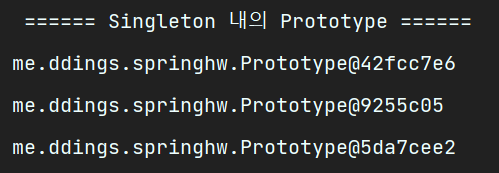
Singleton 객체에서 Prototype 객체를 얻어오면 Proxy로 감싸진 Prototype이 반환되는 식으로 동작하게됩니다.
프록시로 감싸진 Prototype들은 프록시를 벗겨내기전에는 동일한 Prototype으로 취급되지만, 포장을 벗길 때마다 서로 다른 기능을 하는 객체가 반환됩니다.
@Component
public class AppRunner implements ApplicationRunner {

    @Autowired
    Singleton single;

    @Autowired
    Prototype proto;

    @Override
    public void run(ApplicationArguments args) throws Exception {

        Prototype p1 = single.getPrototype();
        Prototype p2 = single.getPrototype();

        System.out.println("p1.hashcCode() : " + p1.hashCode());
        System.out.println("p2.hashcCode() : " + p2.hashCode());
        System.out.println("p1 = " + p1.toString());
        System.out.println("p2 = " + p2.toString());
        System.out.println(single.getPrototype().toString());

        System.out.println(p1 == p2);
        System.out.println(p1.equals(p2));
        System.out.println(new Prototype().equals(new Prototype()));

        System.out.println(p1.getUuid());
        System.out.println(p2.getUuid());


    }
}
이렇게 Singleton 내의 prototype 객체를 살펴보면 흥미로운 사실을 발견할 수 있습니다.
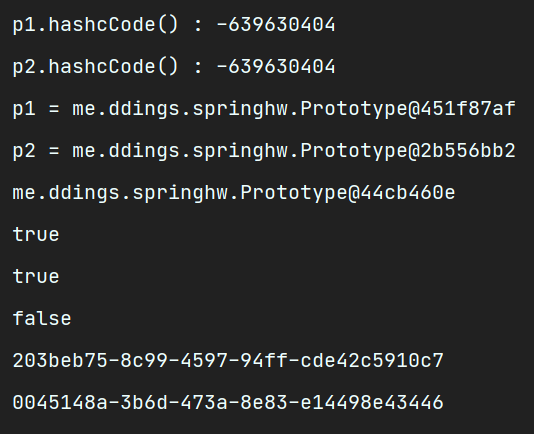
해시코드는 동일하기에 서로 같은 객체로 반환되나, 내부의 final로 선언한 UUID는 서로 다른 값이 반환되며 표기상으론 서로 다른 객체로 판단됩니다.
이는 객체가 프록시로 감싸져있기 때문에 발생하는 것으로, 반환된 객체를 통한 어떠한 작업을 수행하면 proxy가 벗겨져서 실제 prototype을 사용하기에 UUID와 표기상의 값이 다르게 표기되는 것입니다.
singleton이기 때문에 proxy로 감싸진 겉모습은 동일한 객체임을 보장받으며,
실제 작업에서의 prototype은 서로 다른객체임을 보장받는 것이죠.
Singleton 객체의 주의사항
1. 멀티쓰레드 환경에서 속성값이 공유된다. ( 원하는 대로 동작하는지 보장할 수 없음 )
2. ApplicationContext 초기 구동시에 생성되므로, 구동시간이 늘어난다.